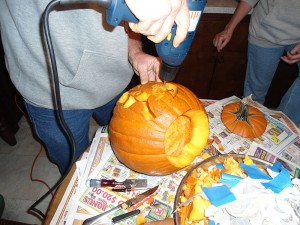
My folks came up for visit this past Saturday. We met up with one of my friends and took his dogs for a nice long walk in a nearby state park, then headed back to my place to carve pumpkins.
I had already bought the pumpkins and a carving kit that included some tools and some patterns. Since I was the host, I did a simple design on mine so that I could help out if anyone needed anything.
The other three used the patterns provided – with varying degrees of success. My friend did well with his pumpkin and the little carving saws. Dad requested another small knife and I found a pocket knife for him to finish up his.
Mom ran into trouble with hers and we later discovered she had picked one of the “advanced” patterns. So, we all pitched in to help out – with Dad doing much of the work, me getting additional tools and supplies, and my friend sharing some ideas.
Our list of tools used:
1. Steak knives
2. A pocket knife
3. Two mini-saws
4. plastic pinwheel for marking the patterns.
5. plastic punch for knocking out sections.
6. a mallet and chisel
7. Toothpicks to repair loose sections of the design.
8. Sharpie markers.
9. plastic pumpkin guts scraper
The design mom did had mini jack-o-lanterns with tiny features. And the mini saws just weren’t up to the task. After struggling with this for a while, Dad turned to me and asked, “Do you have a drill?”
10. Drill
So, back to the basement I went and returned with a drill. We found a three prong outlet, plugged in the extension cord, and Dad drilled out the eyes of the mini jack-o-lanterns – enough that light would show through once we cleaned up the edges.
We got everything cleaned up, went out to dinner, and had pumpkin pie when we got back. Dad took his jack-o-lantern with him when they went home – the rest are sitting on my front porch waiting for a good night to light them up and get some photos.

